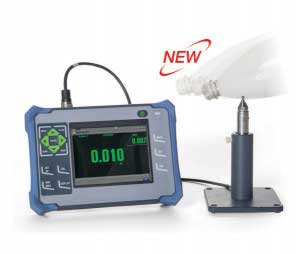
The demand for PET bottles is increasing day by day in different production houses to fulfill the requirement of various applications. The major use of these bottles is in packaging material manufacturing industries to fulfill the requirement of packaging liquids, chemicals, drugs, beverages, medicines, etc. The packaging material is a very significant thing as it maintains the safety and hygiene of the products. Hence, it is important for the manufacturers of PET industries to test the quality of PET bottles using Magnamike 8600 before and after the production process to provide high-quality of goods to their customers.
The producers of PET bottles need to check the quality of the bottles they manufacture so that the clients will get nothing less than the best. The wall thickness of PET bottles is a major attribute of PET bottles that explains the quality of the PET bottles. Hence, it is necessary to test the wall thickness of PET bottles to maintain the level of uniformity of best quality and strength. To measure the thickness of the bottles without deforming the shape and size of the bottle, wall thickness gauge is the best testing equipment which is used to cut the bottles in three sections firmly. It measures the thickness of non-ferrous materials easily and accurately.
Presto offers a high quality of wall thickness gauges that are widely used in PET industries to test the quality of the PET bottles by measuring the thickness of the walls to ensure the uniformity of bottles.
Magna Mike 8600, a Wall Thickness gauge is an easily portable instrument from Olympus used for non-destructive testing. It is a very user-friendly device that performs simple operations and used to measure the thickness of non-ferrous material like Plastics, performs, glass, water tanks, foam, aluminum, PET, etc. The Instrument works on Hall Effect technology.
It is a bottle thickness gauge that uses an easy and simple magnetic procedure to make repeatable measurements for non-ferrous materials testing. The operation of the Magna-Mike is quite simple. Measurements done when the magnetic probe is scanned from one side of the test specimen and the disk is placed on the other side or dropped in a container. The Hall effect measures the distance between the target ball and probe tip. The measurements are quickly displayed on the colored thickness display.
For more information, follow the link and get your query resolved.
