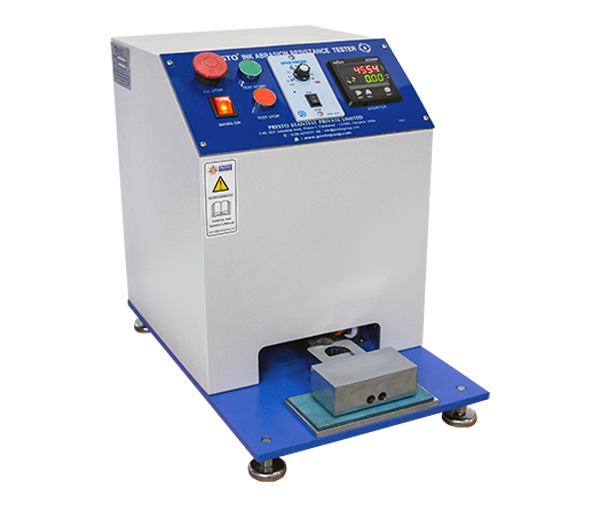
Ink Abrasion Resistance Tester
4.8 out of 5


In the printing industry, checking the abrasion of ink is the most intricate task. If you are looking for highly advanced testing equipment that will measure the resistance against rubbing and scuffing of printed material, then you should go with Ink abrasion resistance..read more
If you wish to test your sample accurately with the help of this testing machine, then you need to prepare it first. To prepare the sample for the upper clamp, you need to take a piece of Sample that the user needs to test. Now, take the “smaller size” of template of size 236x57 mm for 2 Pound and 251 x 57 mm for 4 Pound (provided with the machine) and place it over the sample to mark the size on the sample. Cut the sample. To prepare your sample for lower clamp 270 x 80 mm, take the same piece of sample on which the user wants to perform the test. Now take the “bigger size” of template of size 270mm x 80 mm to mark the size of sample for lower clamp by placing it on the sample. Cut the sample using a cutter or scissors.
For accurate placement of testing, the instrument takes both the sample that you have prepared using templates. Now take out the pin of the upper clamp to separate the upper clamp from the lower one in order to create a specific amount of gap between both the clamps. Now paste the small size sample on the upper clamp and the bigger size of sample on the lower plate. Press both the samples firmly using your hand to avoid wrinkles from samples. In this way, the samples will be firmly placed. Now, you can operate this testing instrument by following the steps mentioned below.
- Turn ON the machine by plugging the main socket of the machine into a 3 pin 15 amp socket.
- Switch on the “Main ON button” from the control panel.
- After pasting both the samples firmly on the device, place the clamping pin of the upper plate back to its position and tighten it firmly to rest the upper plate on the lower plate.
- Set the number of cycles from the Preset Cycle Timer i.e. between 0 – 9999 counts (As per test requirement typically 100 cycles).
- Push the start button to start the test. Users can also click on the reset button during the test to reset the test procedure and then again the start button.
In this way, you can easily operate this testing instrument and complete the test. After test completion, you can remove the sample from both jaws. If you find any issue, then you can consult with us directly.
Features of Ink Abrasion Resistance Tester
There are many features you will get with the use of this testing equipment. Here we have created a list of features below.
- The body of this testing instrument has been made up of mild steel.
- It has powder-coated Havel grey and blue combination and bright chrome zinc plating for corrosion resistance finish.
- Two test loads are given
- The arm will be rotated through the gear motor
- Dimensions of the machine: 300x470x428 mm
Technical specifications
- Rub Speed – 43 cycle/minute – ±2 cycle/minute
- Rub mode – Arc reciprocating movement
- Rub Pressure – 2 lbs and 4 lbs
- Sensor Type – PNP
- Counter – 9999 Digits
- Power Supply – 220V AC, 50Hz, Single phase
Related Products
Bursting Strength Tester Digital Burst Genie 4.0
Tearing Strength Tester- Model No. PTT-560 Prima
Spectrophotometer TP 3100
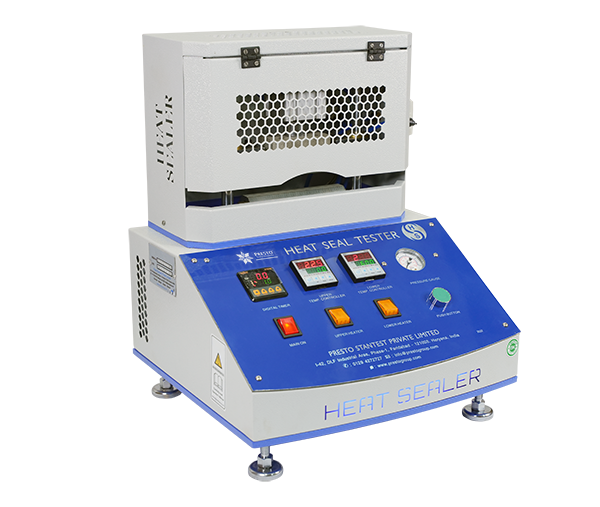
Laboratory Heat Sealer- (500 mm)

For More details & Information
Please fill this form
Ink Abrasion Resistance Tester
4.8 out of 5
In the printing industry, checking the abrasion of ink is the most intricate task. If you are looking for highly advanced testing equipment that will measure the resistance against rubbing and scuffing of printed material, then you should go with Ink abrasion resistance tester. This instrument has been innovated after years-long research. It puts the test sample through extreme conditions. This has been designed specifically for analyzing the resistance of the printed material against rubbing and scuffing. This instrument has been utilized efficiently in many industries to assess the properties of printed materials. Physical conditions contribute a lot in deteriorating the ink of the printed material. Using the ink abrasion resistance tester, manufacturers can make printing material to withstand different physical conditions. The machine is designed with a high-end mechanism to deliver noise-free operation. It ensures that there is a uniform load distribution across the test area. It helps in determining the photosensitive coatings and inks. Manufacturers can make the bonding of the ink strong enough to make it perform better in real working conditions. In this test, the bonding of the surface with ink is put on analysis. Rub resistance describes the ability of printed material to withstand marking, scuffing, or smudging during handling in conversion, packaging, distribution, and use simulates a similar environment to test the rub resistance on printed materials.
You can easily identify the rub quality or rub proof-ness of prints on substrates. The good print quality will be considered to be the perfect combination of good ink, good paper, good process, and good drying. If any of the rub factors will be wrong then the result will be disastrous. You can easily make use of this testing instrument on labels, folding cartons, corrugated boxes, inserts, circulars, and other packaging materials. They are having applied graphics on a flat substrate. The main purpose of using an ink abrasion tester is to evaluate the print quality by rubbing two surfaces against each other. However, if this is done manually, the amount of pressure applied during rubbing cannot be quantified and kept constant. Moreover, it is difficult to keep the plane of contact constant and keep a track of the number of rubs. Hence making this method highly Operator Dependent. The Rub Tester overcomes this by rubbing two printed surfaces against each other face-to-face, at a different speed. The speeds available for testing are: Speed 1 (21 RPM / per minute), and Speed 2 (42 RPM / per minute). This equipment can also be used to evaluate the color transfer from printed/coated surfaces during rubbing. You can easily make use of this relevant testing equipment for printing and processing houses, heavy end users of printed paper, ink manufacturers, research institutions, and packaging development centers. This easy-to-install and low-maintenance testing equipment will serve to be the best for your packaging industry. Thus, you can make use of this testing equipment to make sure you deliver fail-proof products to your customers.
If you wish to test your sample accurately with the help of this testing machine, then you need to prepare it first. To prepare the sample for the upper clamp, you need to take a piece of Sample that the user needs to test. Now, take the “smaller size” of template of size 236x57 mm for 2 Pound and 251 x 57 mm for 4 Pound (provided with the machine) and place it over the sample to mark the size on the sample. Cut the sample. To prepare your sample for lower clamp 270 x 80 mm, take the same piece of sample on which the user wants to perform the test. Now take the “bigger size” of template of size 270mm x 80 mm to mark the size of sample for lower clamp by placing it on the sample. Cut the sample using a cutter or scissors.
For accurate placement of testing, the instrument takes both the sample that you have prepared using templates. Now take out the pin of the upper clamp to separate the upper clamp from the lower one in order to create a specific amount of gap between both the clamps. Now paste the small size sample on the upper clamp and the bigger size of sample on the lower plate. Press both the samples firmly using your hand to avoid wrinkles from samples. In this way, the samples will be firmly placed. Now, you can operate this testing instrument by following the steps mentioned below.
- Turn ON the machine by plugging the main socket of the machine into a 3 pin 15 amp socket.
- Switch on the “Main ON button” from the control panel.
- After pasting both the samples firmly on the device, place the clamping pin of the upper plate back to its position and tighten it firmly to rest the upper plate on the lower plate.
- Set the number of cycles from the Preset Cycle Timer i.e. between 0 – 9999 counts (As per test requirement typically 100 cycles).
- Push the start button to start the test. Users can also click on the reset button during the test to reset the test procedure and then again the start button.
In this way, you can easily operate this testing instrument and complete the test. After test completion, you can remove the sample from both jaws. If you find any issue, then you can consult with us directly.
Features of Ink Abrasion Resistance Tester
There are many features you will get with the use of this testing equipment. Here we have created a list of features below.
- The body of this testing instrument has been made up of mild steel.
- It has powder-coated Havel grey and blue combination and bright chrome zinc plating for corrosion resistance finish.
- Two test loads are given
- The arm will be rotated through the gear motor
- Dimensions of the machine: 300x470x428 mm
Technical specifications
- Rub Speed – 43 cycle/minute – ±2 cycle/minute
- Rub mode – Arc reciprocating movement
- Rub Pressure – 2 lbs and 4 lbs
- Sensor Type – PNP
- Counter – 9999 Digits
- Power Supply – 220V AC, 50Hz, Single phase