Bottle Shaker-GV Shaker
4.9 out of 5


When you open any carbonated drink, then with the pressure of opening the bottle cap, there is a formation of carbon-di-oxide bubbles in it. The quality control is mainly focused on the assessment of bubble formation in these types of carbonated beverages. These..read more
If you want to operate this testing machine, then you need to perform the installation of this testing machine. To do this, you need to remove the packing of this testing equipment and place it on a flat surface that must be preferably a concrete shelf. You should put the machine near a single-phase socket. Place the machine at a distance of 1 ft. clear from the wall. Grouting of the machine needs to be done using the hex bolts as the machine vibrates at the time of the test procedure.
In this way, you can easily perform the installation of this testing machine in your testing laboratory. To place the sample accurately in this testing machine, you can start by placing the probe of temperature gauge above the level of the pressing tool. Put a filled and sealed cold drink bottle under the pressing tool by maintaining the center. Close the swage lock valve and punch the pressing tool in the cap of the cold drink bottle and press it down on the cap firmly. The pressure gauge will read some value now and open the swage lock valve slightly to bring the pressure gauge reading to zero and then close it. Now push down the temperature gauge to make its probe come in contact with liquid. Now place the carbonation assembly on the provided fixtures of the G.V. shaker. At this time, there must be no leakage from the carbonation assembly. After placing the carbonation assembly on the provided fixture on the S.S. tray, put ON the mains supply through the control panel. Adjust the speed through the speed regulator by moving clockwise (to increase) or anti-clockwise (to decrease) the required speed. Set the time of testing through the digital preset timer. Adjust it as per sample to be tested in seconds or minutes range.
Testing of the specimen will get started after following the above-mentioned steps. After the set duration of time, the machine will automatically stop. Take out the sample from the fixture and observe the result. If you find any issue regarding the working of this testing instrument, then you can click the link below.
Features of Bottle Shaker-GV Shaker
There are many features you will get with the use of this testing instrument. We have created a list of those features below:
- High-Quality rugged structure with corrosion-resistant main body
- Digital Preset timer to set test duration
- Stainless Steel fabrication for robust construction
- Sample Holding Mechanism with locking clip
- Single-handed hassle-free operation
- Speed controller to set the speed of Shaking/vibration of GV table
- Auto-stop of the equipment after a set time or test completion.
Technical specifications
- Wattage: 1KW
- Voltage Requirement: 1 Phase 5 Amp./230 AC Voltage
- Connection Type: 3 Pin Plug 5 Amp
- Speed: Speed Control System (Dimmer – BT)
- Digital Timer Range: 99.9 Sec & 999 Min (Selectable Range)
- Digital Timer: 3 - digit digital display with a preset timer
- Outside Body: Stainless Steel
- Tray: SS tray
- Fixture: Assembled
Related Products
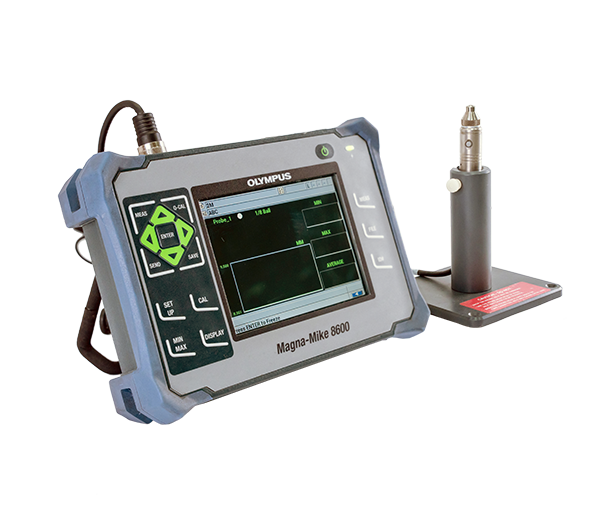
Wall Thickness Gauge (MagnaMike 8600)
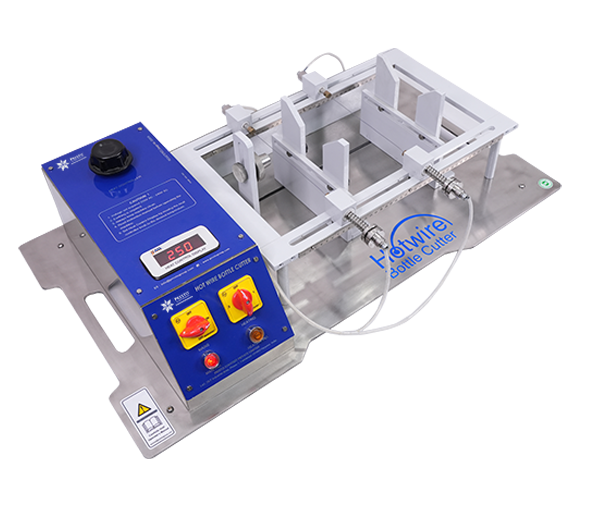
Hot Wire Bottle Cutter – NXG Model

Illuminated Inspection Magnifier
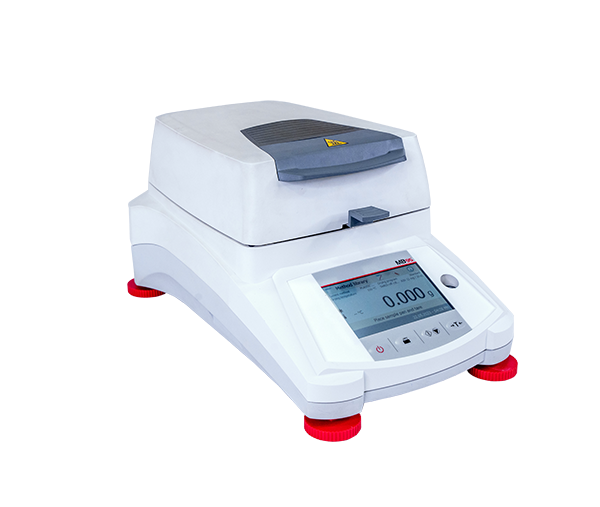
Moisture Analyzer M95

For More details & Information
Please fill this form


Bottle Shaker-GV Shaker
4.9 out of 5
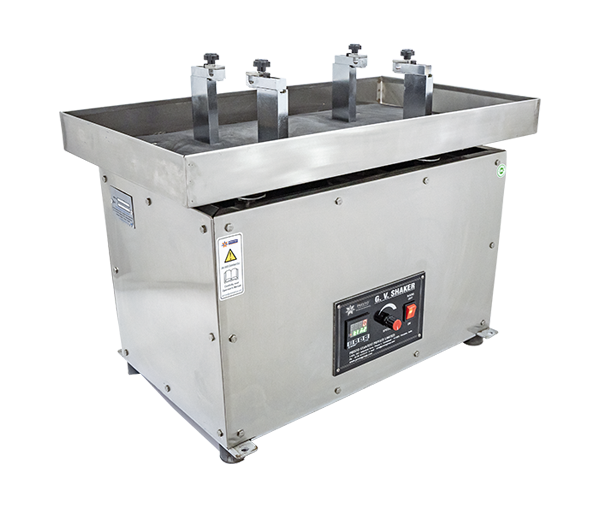
When you open any carbonated drink, then with the pressure of opening the bottle cap, there is a formation of carbon-di-oxide bubbles in it. The quality control is mainly focused on the assessment of bubble formation in these types of carbonated beverages. These bubble formations have an impact on sensory characteristics like aroma release, mouthfeel, and perception of taste. Thus, to keep a check on the production of carbon dioxide bubbles in carbonated drinks, you can easily make the use of Presto bottle-shaker- GV Shaker. It is a mechanical and motorized testing instrument used to automate the shaking of bottle specimens to simulate the carbon dioxide, present in the test specimen. To perform the test procedure, the test sample is placed in the carbonation assembly and placed on the Bottle shaker. This testing instrument comprises an adjustable bottle shaker to evade bottle slippage at the time of shaking. The device is fabricated with stainless steel material. It is easy to use a device that easily accommodates a bottle of standard size on the instrument.
We all know that all manufactured items are subjected to varying degrees of dynamic stimulation such as vibration, fatigue, mechanical shock, acceleration, normal handling, and shipping. Items designed to withstand these stresses should be tested to ensure proper quality. Thus, with Presto GV-shaker, Laboratory dynamics tests are performed on samples under controlled conditions, either as single tests or as combinations of several types of tests. Those who are working in the PET bottle industry should make use of this testing instrument. It can be started with a single push of a button and automatically stops on the completion of Set time.
It comes with an advanced set of features that make it easy for you to test your product. You will get an adjustable and satisfactory platform to clutch the bottle and to evade bottle slippage. The machine is designed completely with stainless steel and comes with an auto-stop feature. This is one of the very important tests that will help you understand the retention of carbon dioxide in the bottle. When you purchase this testing instrument from Presto, then you will be able to get certain components in the main unit of this testing instrument. It includes S.S. Tray, Main Body, Main ON Rocker Switch, Grouting Nuts, Speed Meter, Control Panel, and Holder Fixture. You can install all these components and start with the use of this testing machine.
If you want to operate this testing machine, then you need to perform the installation of this testing machine. To do this, you need to remove the packing of this testing equipment and place it on a flat surface that must be preferably a concrete shelf. You should put the machine near a single-phase socket. Place the machine at a distance of 1 ft. clear from the wall. Grouting of the machine needs to be done using the hex bolts as the machine vibrates at the time of the test procedure.
In this way, you can easily perform the installation of this testing machine in your testing laboratory. To place the sample accurately in this testing machine, you can start by placing the probe of temperature gauge above the level of the pressing tool. Put a filled and sealed cold drink bottle under the pressing tool by maintaining the center. Close the swage lock valve and punch the pressing tool in the cap of the cold drink bottle and press it down on the cap firmly. The pressure gauge will read some value now and open the swage lock valve slightly to bring the pressure gauge reading to zero and then close it. Now push down the temperature gauge to make its probe come in contact with liquid. Now place the carbonation assembly on the provided fixtures of the G.V. shaker. At this time, there must be no leakage from the carbonation assembly. After placing the carbonation assembly on the provided fixture on the S.S. tray, put ON the mains supply through the control panel. Adjust the speed through the speed regulator by moving clockwise (to increase) or anti-clockwise (to decrease) the required speed. Set the time of testing through the digital preset timer. Adjust it as per sample to be tested in seconds or minutes range.
Testing of the specimen will get started after following the above-mentioned steps. After the set duration of time, the machine will automatically stop. Take out the sample from the fixture and observe the result. If you find any issue regarding the working of this testing instrument, then you can click the link below.
Features of Bottle Shaker-GV Shaker
There are many features you will get with the use of this testing instrument. We have created a list of those features below:
- High-Quality rugged structure with corrosion-resistant main body
- Digital Preset timer to set test duration
- Stainless Steel fabrication for robust construction
- Sample Holding Mechanism with locking clip
- Single-handed hassle-free operation
- Speed controller to set the speed of Shaking/vibration of GV table
- Auto-stop of the equipment after a set time or test completion.
Technical specifications
- Wattage: 1KW
- Voltage Requirement: 1 Phase 5 Amp./230 AC Voltage
- Connection Type: 3 Pin Plug 5 Amp
- Speed: Speed Control System (Dimmer – BT)
- Digital Timer Range: 99.9 Sec & 999 Min (Selectable Range)
- Digital Timer: 3 - digit digital display with a preset timer
- Outside Body: Stainless Steel
- Tray: SS tray
- Fixture: Assembled